This tutorial is intended to show you how to use commands and/or FISH functions to send email messages, including attachments, using recent versions of 3DEC, FLAC3D, PFC, and UDEC.
This capability may be useful when modeling to:
- inform you when a model has reached a certain stage in the overall model or the model has finished running;
- send you a result as soon as it is available (e.g., plot(s), measurement, variable value, chart, output file); or
- inform you that an error has occurred and the model run has been interrupted.
This functionality requires that you have an email service that permits third-party access. Refer to your email service provider's instructions for checking email though other email platforms or contact IT at your organization for the required account settings. At no time does Itasca have access to this information or emails.
The project and datafile tutorial discussed below is available to download as a zipped file.
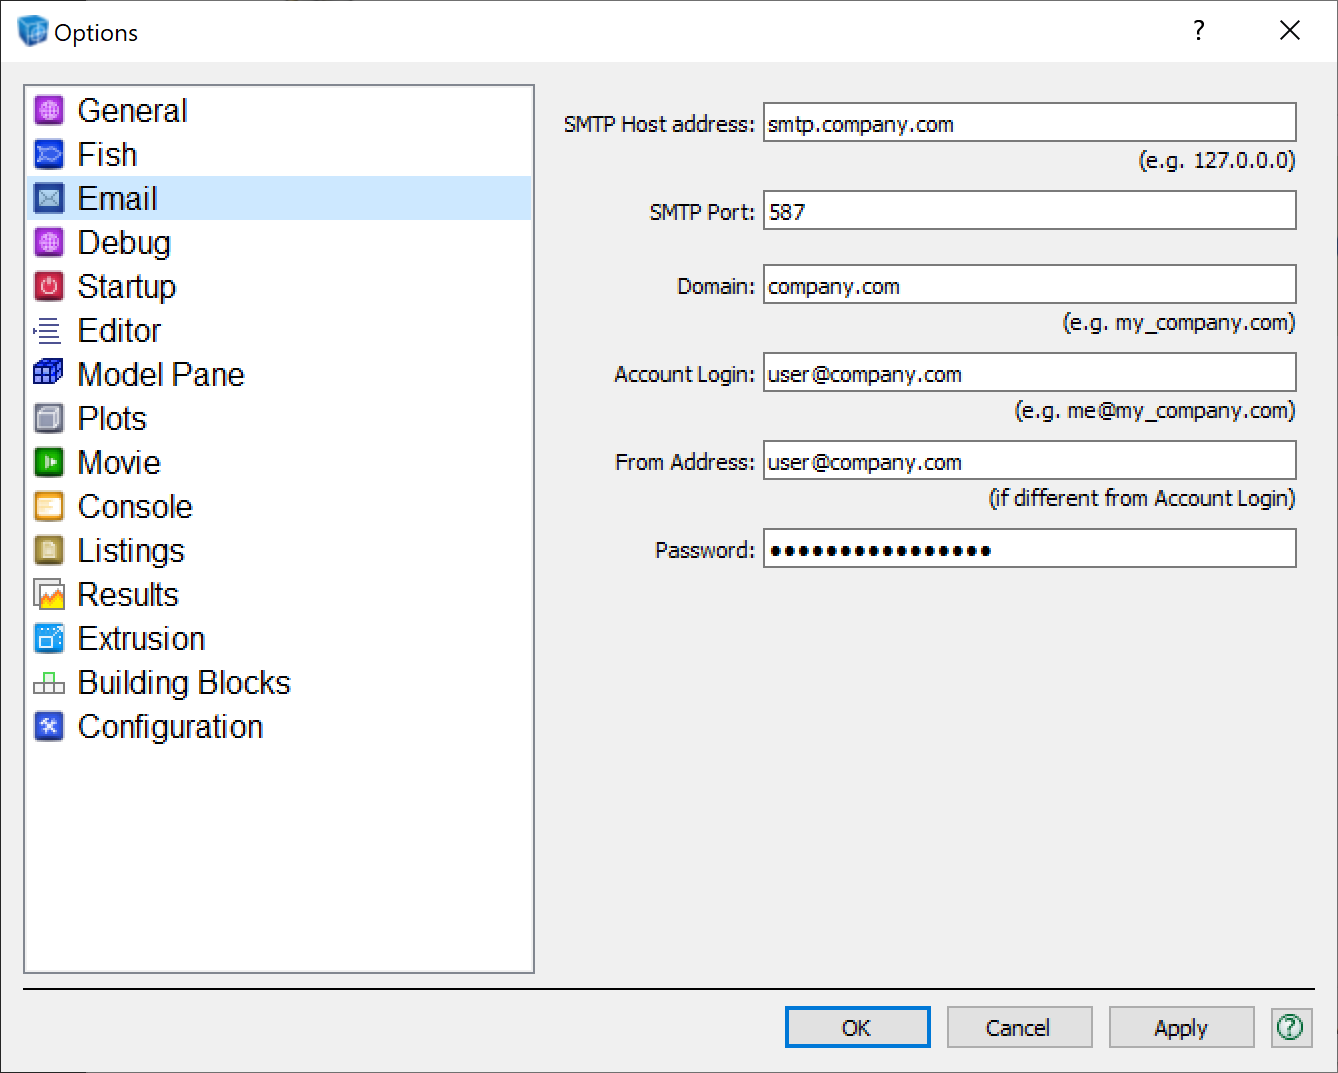
Set Email Preferences
To simplify working with email, consider adding your email account settings and credentials via the Email Options dialog (shown below). You can find this via the main menu under Tools > Options > Email. As will be shown, the settings can be directly specified using commands or FISH, but using the Email Options dialog is recommended as it allows you to protect (hide) your email account password. The values in this dialog will be updated with any values you set using commands and/or FISH. Note that these settings are "sticky" and will be retained so that they are there the next time you run the software on the same computer. Refer to Itasca's online documentation to learn more about Email options.
The command program mail and the FISH mail utilities let you set email account preferences (account, host, port, password) and compose (to/cc/bcc, subject, body, and attachments) and send emails. Refer to Itasca's online documentation for more details about mail commands or FISH mail utilities.
Using Commands
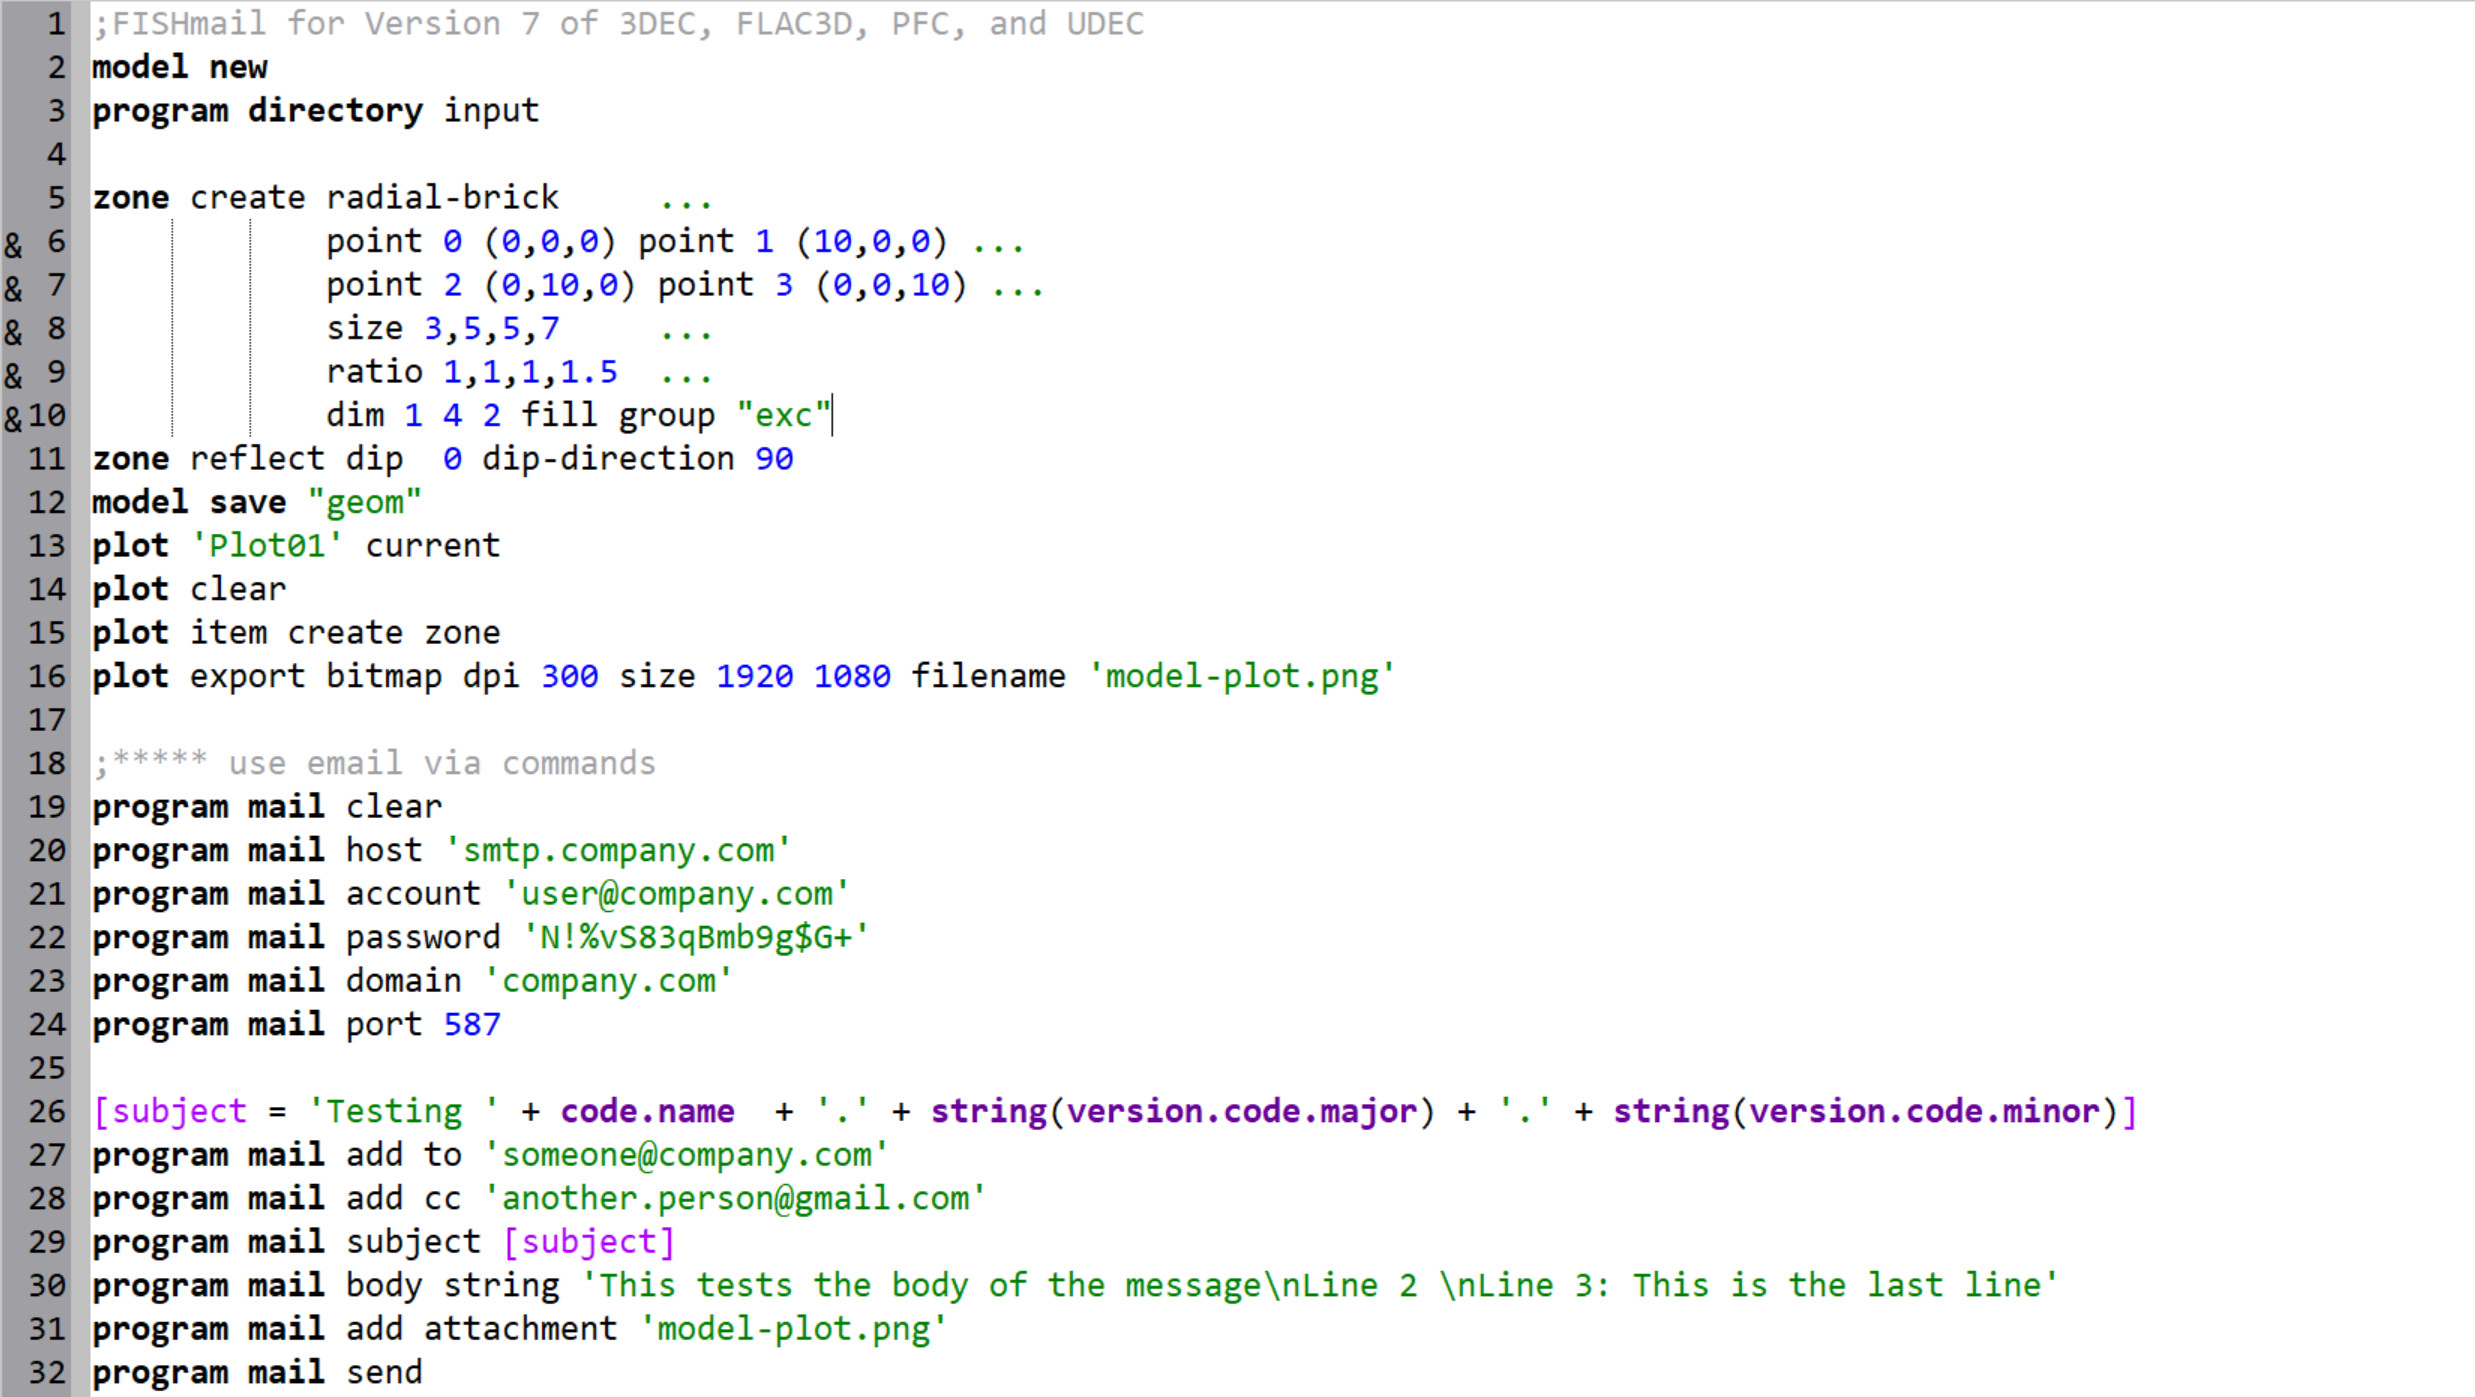
So that we have something to plot, the first 12 lines simply construct a quarter-symmetry, radial mesh model and saves the model as geom.sav.
Lines 13 - 16 set Plot01 to be the current (referenced) plot, plot the model zones, and export it as a PNG bitmap (1920 x 1080 pixels at a resolution of 300 dpi) with the filename model-plot.png.
Lines 18 - 24 set your email account credentials for some third-party email service (e.g., Gmail or your company). If you have already added this information into the Email Options dialog, you can skip these lines. Note that any commands issued will modify the values in the Email Options dialog.
Line 26 is some inline FISH (i.e., compact FISH function) so that we can access and combine some FISH variables into a single FISH variable called subject. This will be used to populate the email subject. Recall that strings (text) in FISH may be combined using the + symbol, similar to & in Excel.
Lines 27 - 28 define the recipients that we want to send (to, cc, or bcc) the email to.
Line 29 defines the email subject heading, which (in this example) is our earlier FISH variable subject.
Line 30 defines the email body, which may be a file or a string. In this example a string is used. The string also shows how you can include carriage returns (new lines) in your message to help format your text.
Line 31 attaches the plot bitmap file that was previously created.
Line 32 actually sends the email based on the information provided above and/or defined in the Email Options dialog.
Using FISH
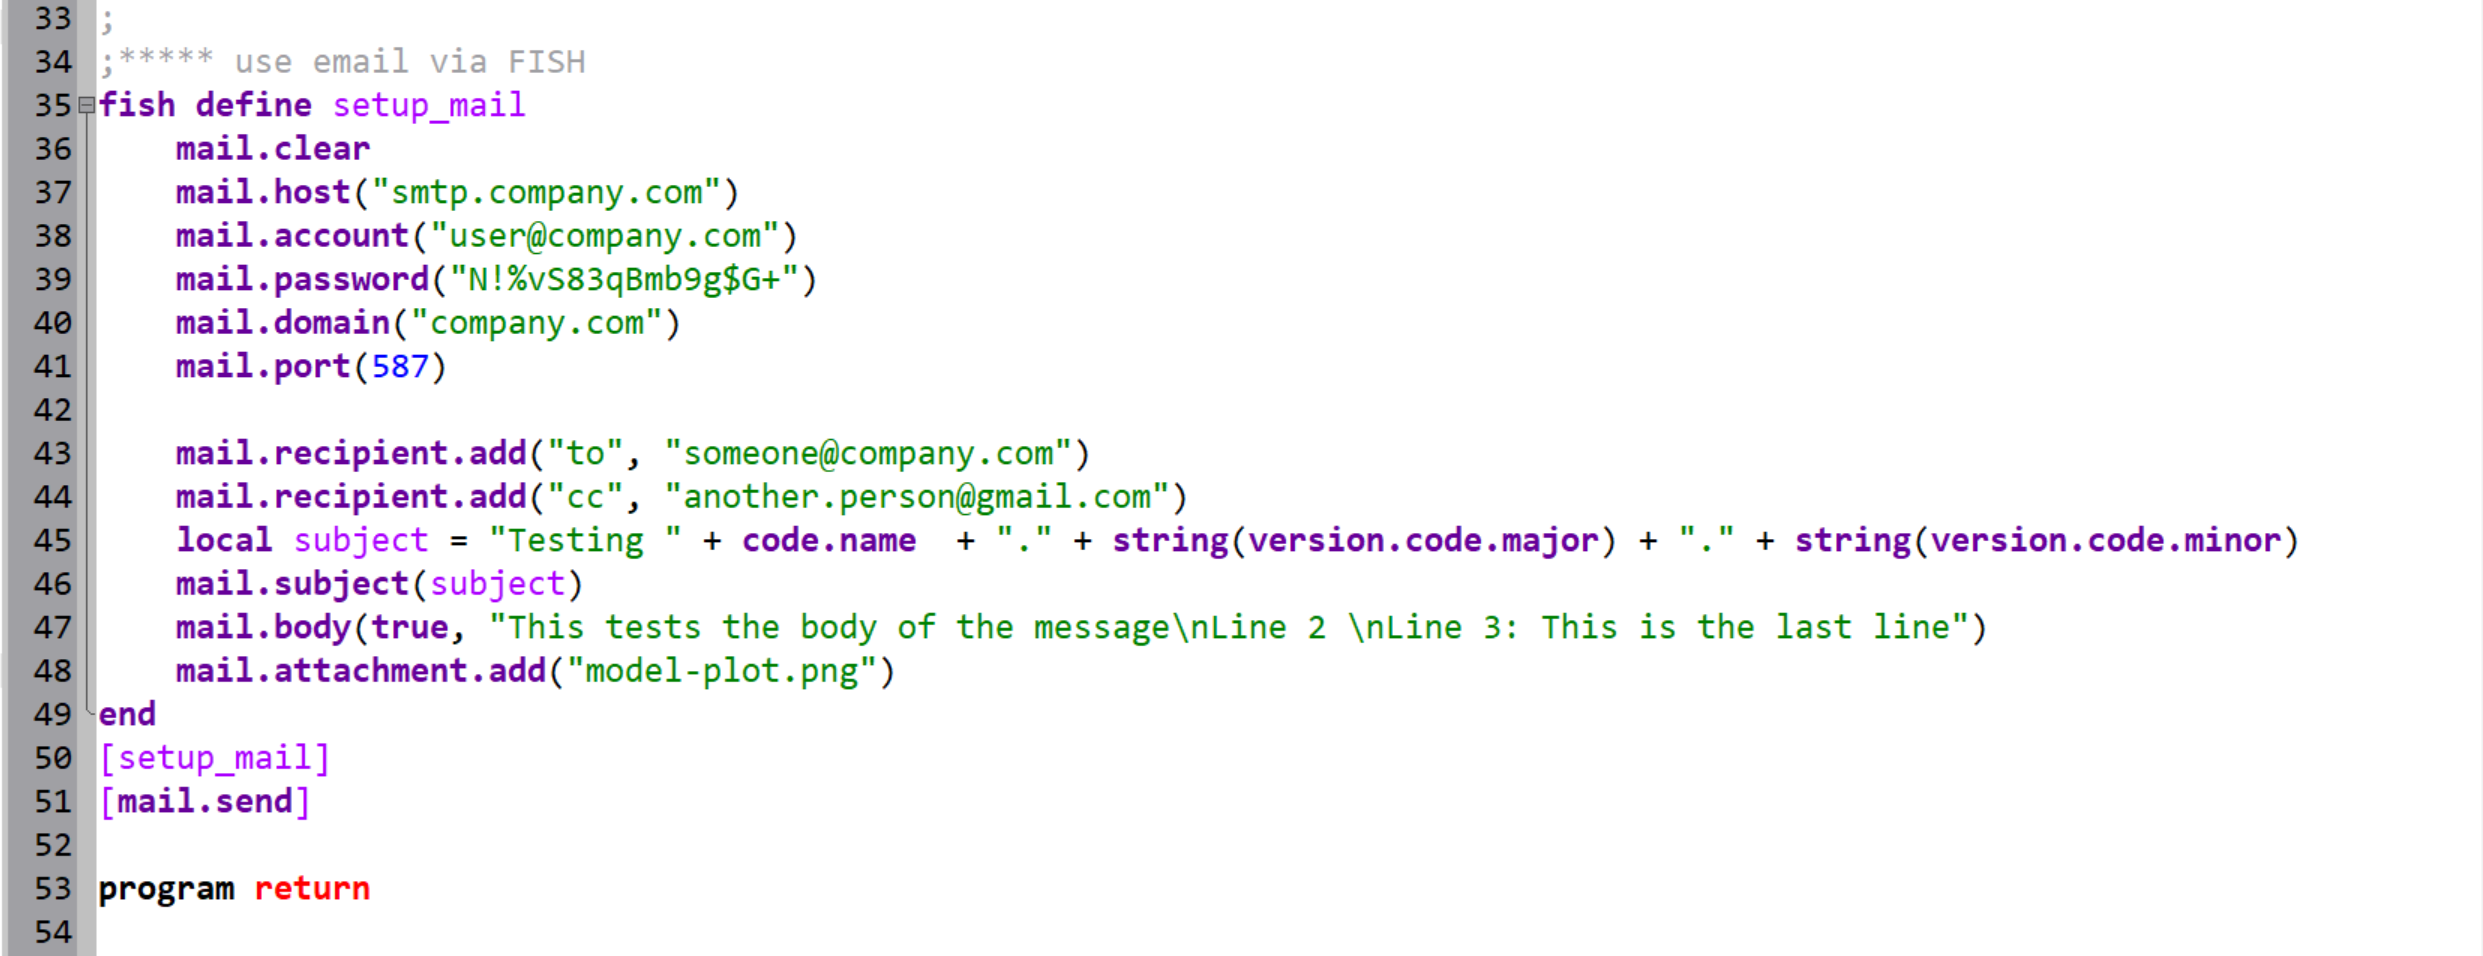
The FISH function follows the commands and repeats the same actions. You can add the command program return to stop the data file before it executes the FISH related lines or comment out (;) one or the other set of lines to prevent them from running. Otherwise, expect to send two emails after configuring and running this datafile.
Lines 35 and 49 define the FISH function and its extent.
Lines 36 - 41 set your email account values. These can also be defined in the Email Options dialog. Setting these by FISH will update the values in the Email Options dialog.
Lines 43 - 48 define your email recipients (to, cc, and bcc), access and combine FISH variables for a single subject heading variable, define the message body, and attach the model plot file. Note that the body mail function uses a Boolean value to indicate if using a file or string for the body.
Line 50 executes the FISH function called setup_mail.
Line 32 actually sends the email based on the information provided above and/or defined in the Email Options dialog.
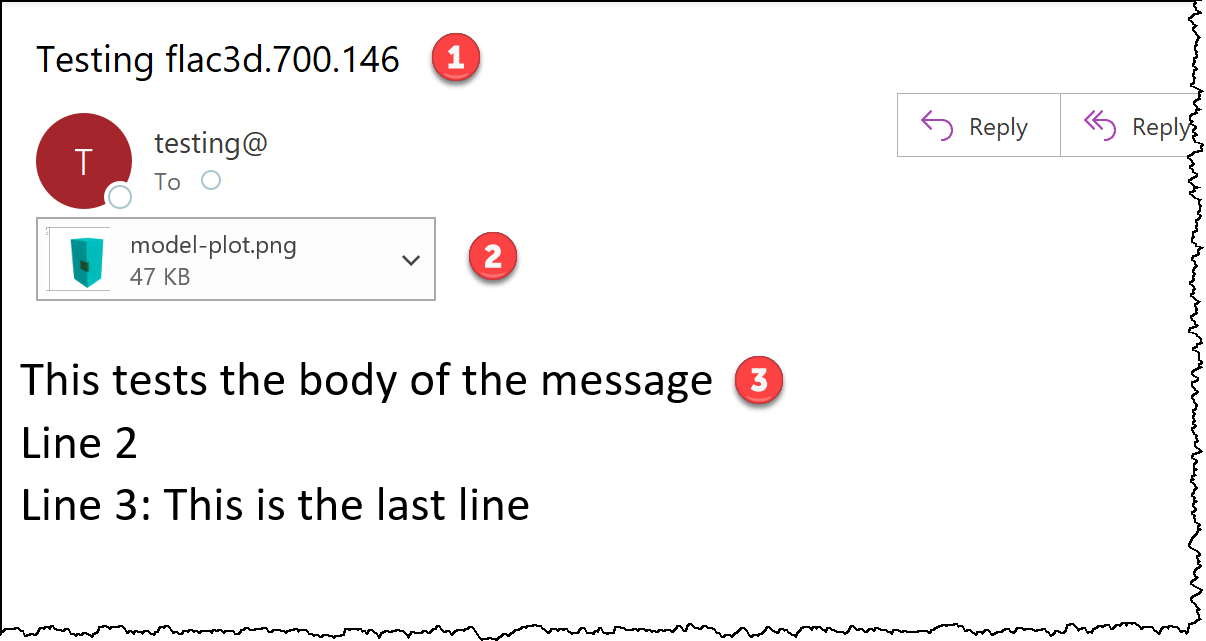
Received Email
The resulting email message is shown below highlighting the (1) subject line, (2) attached model plot, and (3) body.